
Installation of water rotary joint on machine tool spindle machining center

To ensure the maximum service life and reliability of Dulwich's Rotary joints, installation engineers need to follow these simple steps.
Step 1 Lock the pipe joint on the rotary joint
The rotary joint is fixed on the bench vise, then the pipe joint is wrapped around the leak-proof tape, and it is locked with a wrench as shown in Figure 1.
Step 2 Lock the rotary joint on the end face of the tie rod
Pay attention to the cleanliness of the joint and the end face of the tie rod. There must be no burrs, dust, etc. to ensure that the leak-proof effect and deflection are normal after locking as shown in Figure 2.

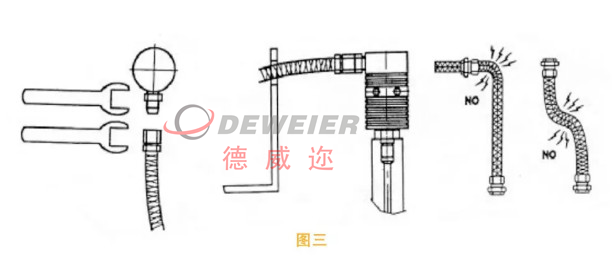
Step 3 Lock the high pressure pipe to the pipe joint
Use two open-end wrenches, one fixed pipe joint and one locked high-pressure pipe to avoid damage to the rotary joint under the influence of force. In addition, the high-pressure pipe should be guided by a bracket. , Avoid subjecting the rotary joint to impact or bending forces (high-pressure water will make the pipe hard) to ensure the life of the rotary joint as shown in Figure 3.
Recommended use of rotary joints
In order to ensure a longer service life of the rotary joint, the main shaft should be turned first and then the water should be supplied when the center is supplied with water, and the water should be stopped before the main shaft is stopped. The cutting fluid should be considered in accordance with the requirements of the rotary joint specifications, and the cutting fluid should be replaced regularly to avoid deterioration (thickness) and maintain the lubricity of the cutting fluid. Note: If there is no through hole in the shank tool, the center water (gas) should be avoided to avoid the shaft seal being damaged by the force.


